I have recently had some people bring to me some ideas for dresses for me to make. I was hesitant at first because I was not a huge fan of the dress, but after making them, I am in love with them. They were so easy to make and I had some great directions to follow, which makes it even better.
After a couple of days, and yes, I literally mean a couple of days, I finally found the one that I thought would be the best pattern and have a great tutorial. I am pretty picky when it comes to patterns, and if I am going to buy them, they need to be in my language! Lots of pictures and detailed instructions. :)
Not long ago I bought a pattern for some leggings, and after purchasing the pattern, reading the instructions, and then beginning the project, I got frustrated halfway through when the instructions were not as clear in doing as they were in reading. Anyways, now I do extra research to make sure I get what I'm looking for.
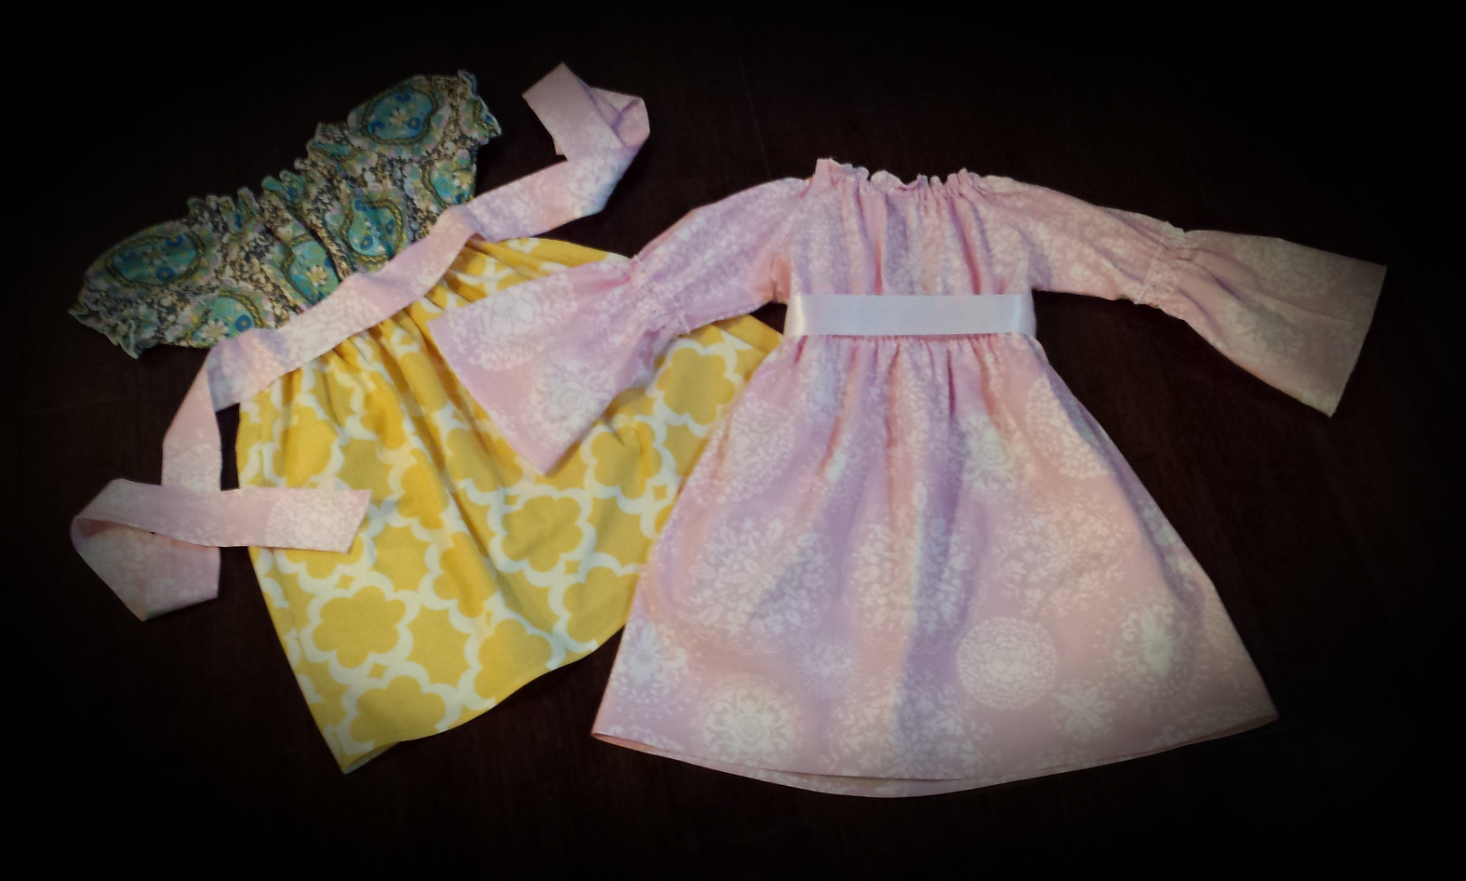
So on to the dresses! I decided to go with The Perfect Peasant from Peek-a-Boo Pattern Shop. Like I said, the instructions were very clear, with pictures to go along with every step. It also has a lot of options such as short and long sleeves, sash, and bows for hair clip or as an accessory for the sash. However, I made a modification on the long sleeve. Instead of doing a straight sleeve, I cut it in half and used the elastic to create a dimensional ruffled sleeve. I like this quite a lot better than just a straight sleeve. It was just missing something in my honest opinion.
So here they are! I can not decide which I love more! There are so many things I could do with these. Sash, no sash, solid color, mixed patterns, dress or a top paired with leggings or ruffled pants, the list is endless. And by the way, in case you were wondering, I am working on ruffled pants and leggings to be paired with any of the dresses/tops that I create. I'm really excited! The most annoying part? Waiting for them to get here! Ugh, I seriously have an addiction to fabric!
Here are some individuals with my daughter posing. Please keep in mind, she does not like dresses! Haha...which makes these funnier!
Something I added, because I'm a fan of the finished edges, is the rolled hem. This is something I just learned and am so excited I took the time to find this one. You can see the threaded edges rather than just hemming. It adds just a little extra...something. :)
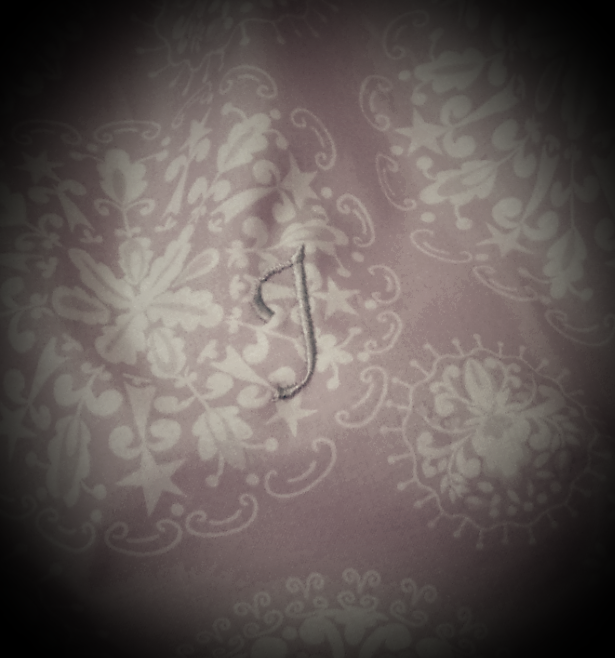
Another added touch? Monogramming! The downfall? My machine is not equipped to do very large prints. I am definitely thinking about getting a machine to accommodate for larger hoops if there is a need from requests. At this point, the largest I can do is 1.5" to 2" depending on the font. However, a way around this would be to use a contrasting thread. I'm thinking a dark blue would really have stood out on this.
Great pattern, great fabrics, lots learned! It was a great week and I am so happy with the end result!
Thanks for stopping by!
~Meg
Friday, January 31, 2014
Tuesday, January 21, 2014
The 'Izzy Top' and Ruffled Pants!
I recently came across this FREE pattern with included tutorial for the 'Izzy Top' from Climbing The Willow. This pattern was popping up all over my news feeds in different craft groups I follow and of course I had to jump on that bandwagon...it was too cute not to!
Here is the link for another free tutorial on how to make the ruffled pants from The Sewing Dork. It is hard to tell from the pictures, but my modifications are that I did not include elastic around the entire waistband. Rather, I stretched it across the back so the 'bunchiness' that it creates is around the back waist line rather than the front. Also, I put my ruffles closer together and did not make them as full as how most seem to be these days. Don't get me wrong, I love the big ruffles! But, for this tot who is still unstable on her feet, I opted for something that would not trip her up.
She was thoroughly excited, and not by her new outfit, but mostly because she heard the familiar voices of her brother and sister from downstairs. She was ready to go play after nap time! However, I was taking full advantage of her giddiness and snapping away as many pictures as I could get. :-)
I am thinking we have a winner for her Valentine's Day/ FIRST Birthday party outfit?? This was my intent when making the outfit anyway. But you never know, there is a good possibility I will find another pattern I just HAVE to try! Which happens...ALOT!
On another note, did you happen to spot my new labels? I am so excited to be able to add that little extra touch, you know? I plan to eventually have embroidered labels but for now, and with everything else I've been creating, I will stick with these until I run out. But not too bad for printable fabric.
And just because I adore my little model, here's another of her beautiful face!
Thanks for stopping by!
~Meg
Saturday, January 18, 2014
The 'Cindy Lou' Dress!
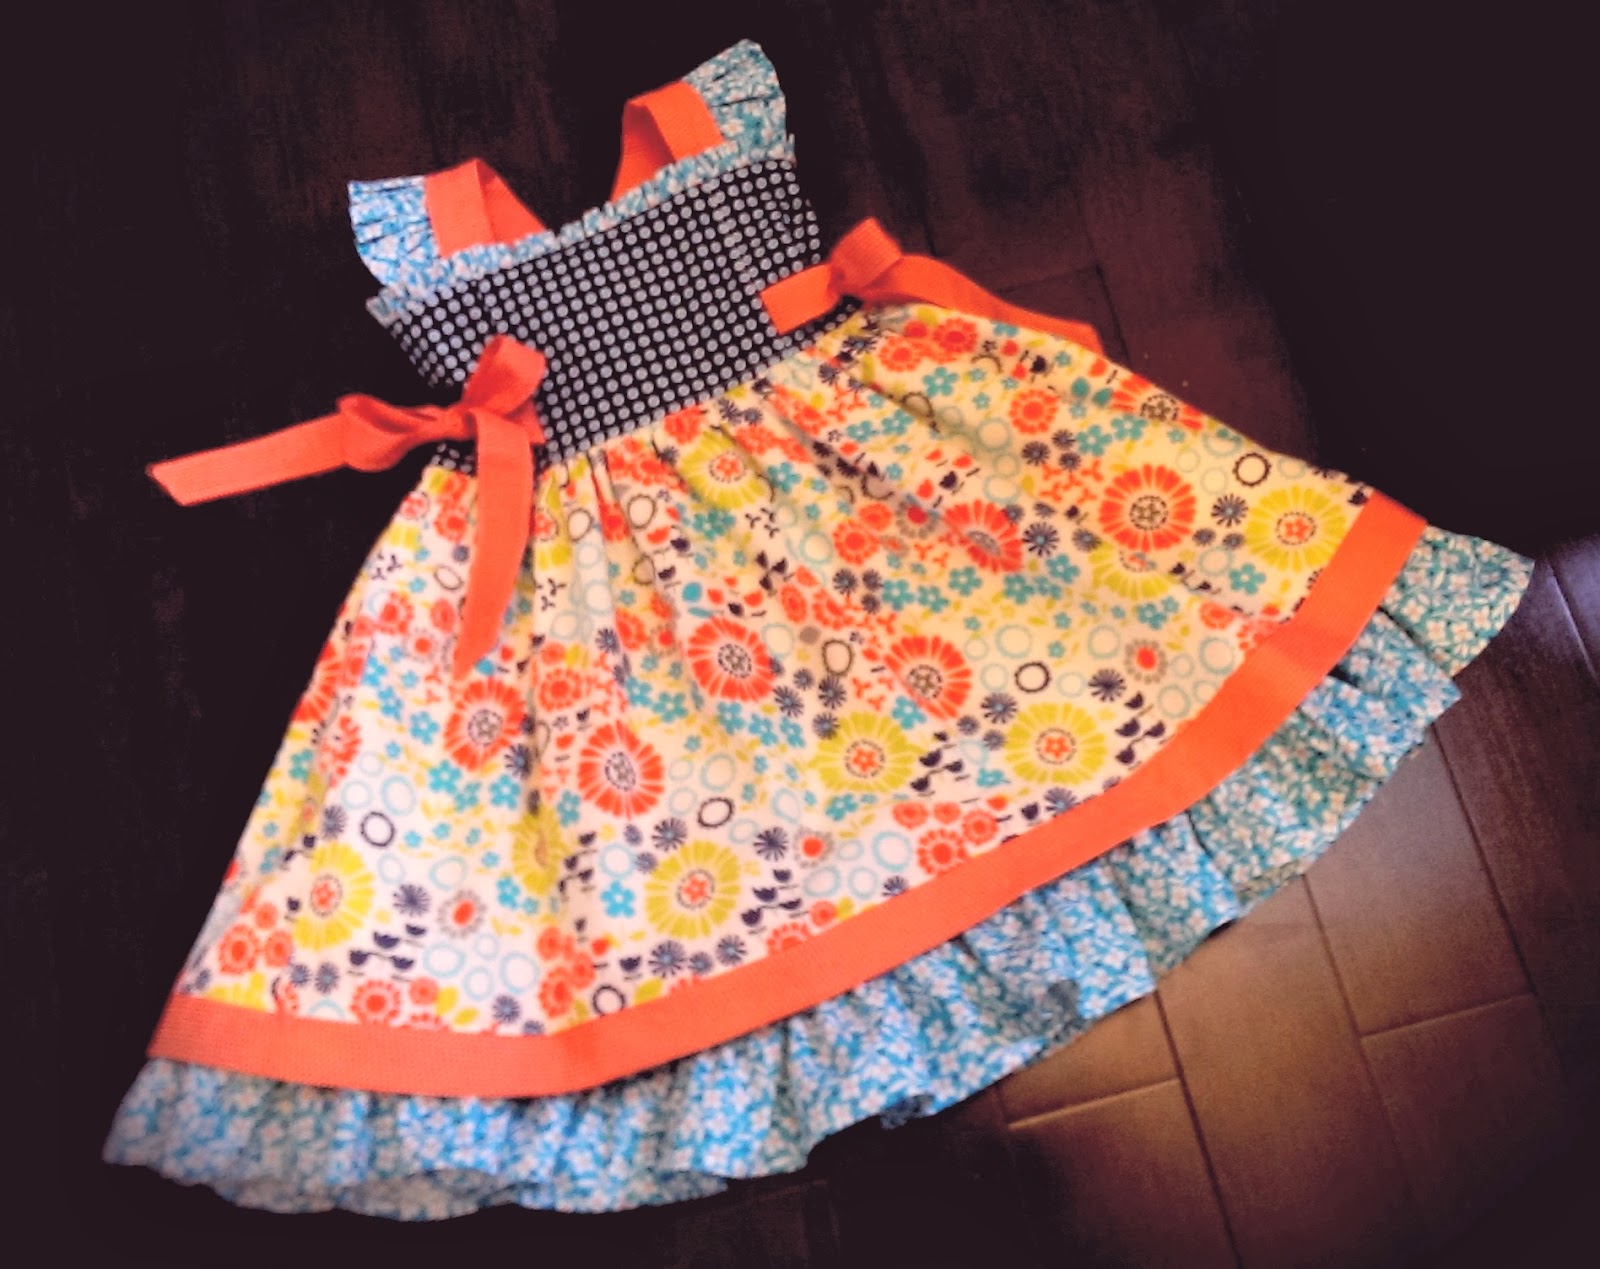
This dress is from the pattern 'Cindy Lou' by FooFoo Threads! I am so excited about this dress! It was a challenge in every way for me to complete since I am still a newbie, but I learned so much. Plus, it turned out exactly as it was supposed to. It is perfect!
This was my first time actually following a pattern. I have tried in the past to follow patterns from big commercial brands, such as Simplicity, and they have always seemed so difficult, so there they sit in the cubby collecting dust. Maybe now that I know I can actually follow a pattern and understand the instructions, I will have to pull the others out and give them a try!
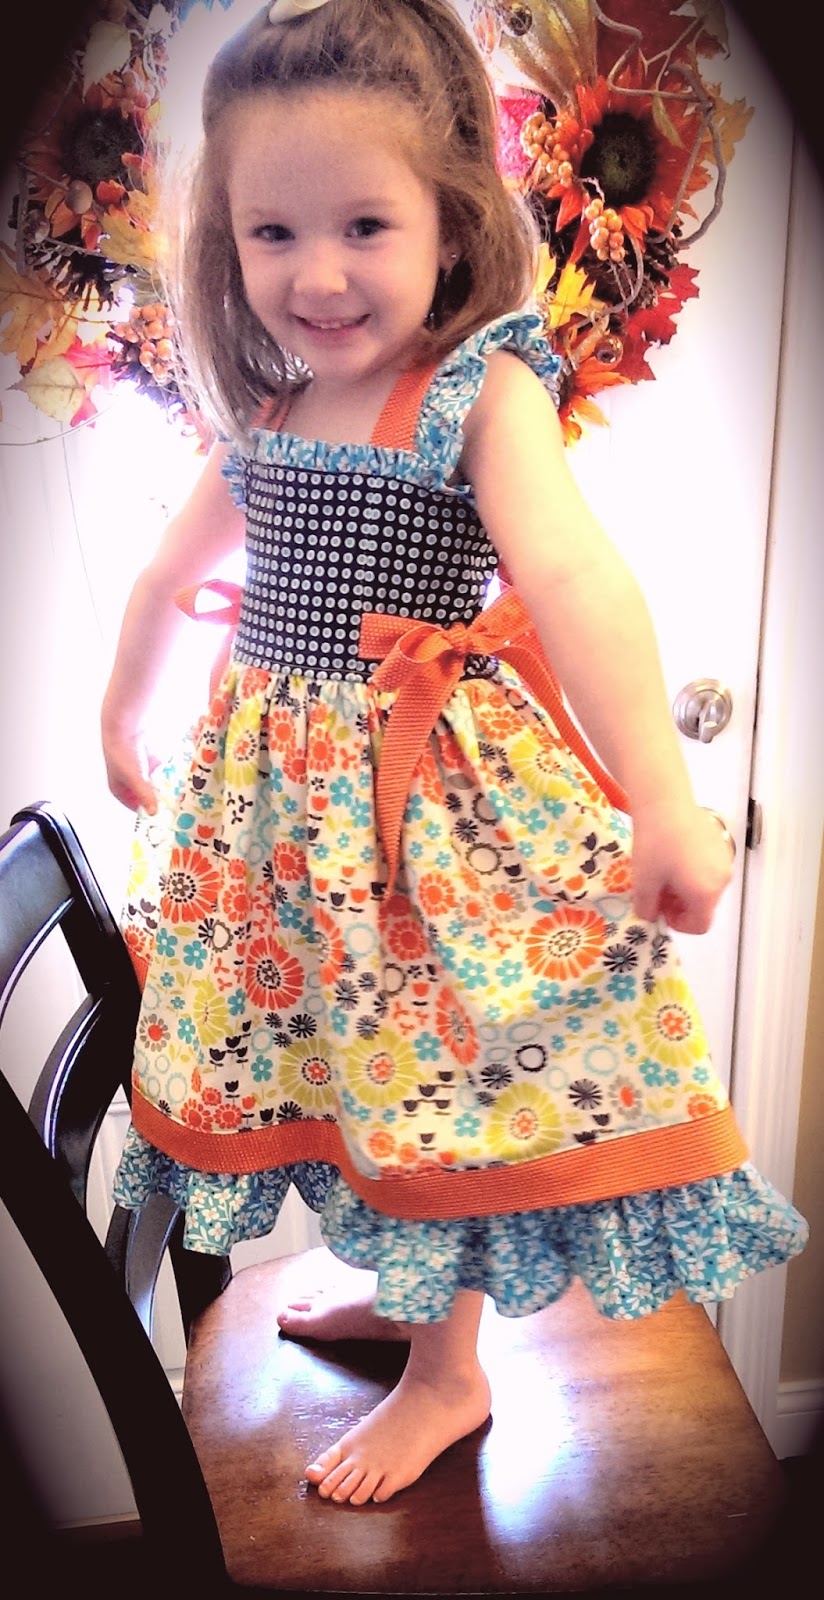
This dress has such a whimsical flare to it and even my daughter, who is not big on dresses, loved this dress. Probably, too, because I let her pick the fabric out. Blue is her favorite color which was great because blue goes with just about anything. However, she specifically asked for a blue and orange dress. Obviously, I catered to her wish and I'm so glad I did. This will be a perfect spring/summer dress. And hopefully, since she had a hand in the design, she will actually put it to use! One can hope...
One of my favorite parts of this dress are the knotted ties. They are a big trend right now and super easy to do! The back and side ties really give this dress that extra flare.
And, let's not forget the ruffles! Ruffles, ruffles everywhere! Check them out...the straps, along the top of the bodice, the skirt, and the underskirt. They really add volume to the dress and provide it with its own natural twirl.The lay of the dress is full without being too bulky.
Ah, and here she is in all her glory. My little girl showing off her new dress! Her favorite thing by the way...twirling! She loves that when she spins around the room, the dress flares out. Who can blame her!? It was my favorite thing when I was little too. Oh, that and my picture taking (clapping) shoes! :-)
If you loved this dress as much as we did, head over to FooFoo Threads to get your pattern.
Have a question? Comment or send me a message. I'd love to hear from you!
Thanks for stopping by!
Meg
Monday, January 6, 2014
How to make a Knotted Jumper!
*Please read through full tutorial before beginning any project to make sure the instructions are clear. I have started a few projects only to stop half way through because the instructions were not clear. I will try to make them as clear as possible, but if there are any questions, please let me know so I can update where needed. Thanks!*
I am in love with the twirly mixed patterned knot dresses and have been wanting to make one for a while now. When I stumbled across this tutorial by Cheri at Moda Bake Shop I was beyond excited! So many I find are intricate with lots of detailing and I was looking for something a little more basic so that I could practice ruffling and button holes (for the knot ties).
This is my step by step instruction in order by which I completed the dress.
What you'll need:
* PDF Download for bodice found from Moda Bake Shop (18-24 months) in above link.
You will need to download this and open with Adobe. Print 'Actual Size' for accuracy.
* Jelly Roll (multi patterned strips - see below)
* 1 yard coordinating fabric
* Coordinating thread
* Fabric Scissors and/or rotary cutter
* Cutting mat
* Iron
Step 1: Cut out your fabric pieces. You will need 4 bodice pieces, 32 jelly roll strips, 5" long x width of skirt for bottom strip, and strips for your knotted ties.
Begin by deciding on the pattern you wish to have when you look at the dress. Once you have that, you will need to iron the strips and then cut each strip into fourths until you have the desired width, which in my case was 32 strips.
You can then line them out to determine the width of the skirt in order to measure out the bottom strip of the skirt. Again, the length should be 5" long x's width of skirt. Once you have that cut, fold this strip in half lengthwise to give you a 2.5" length, with wrong sides together, so that you have the right side of the pattern on the front and back of the strip.
Using the pdf bodice pattern, or any other bodice pattern you prefer, cut 4 separate pieces. Iron flat.
For the straps I took two full jelly roll strips and halved them, giving me a total of 4 strips. And, iron flat.
Step 2: Sew the jelly roll strips together using a straight stitch or zig-zag to form the skirt.
Sew along the right side of the strip with right sides together.
I used an overcast stitch, as shown below, which is probably overkill but I like the finished look. If using a straight stitch, open seams and iron flat so there is no bulk under the dress.
Then, iron out the skirt to prepare it for the next step.
Step 3: Add the bottom strip to the dress.
This can be done by laying the bottom strip on top of the right side of the skirt, rough edges aligned.
Pin the fabric so that it stays in place and then sew with your preferred stitch.
Once done, flip down and iron flat.
Step 4: Sew the bodice pieces.
Take two bodice pieces right sides together and sew along the sides. (Not the armholes or neck line)
Repeat for other two bodice pieces.
Next, put one bodice piece inside the other with right sides touching. You should only see the wrong sides.
Step 5: Sew the straps, finish bodice, add button holes.
**Note: I made my straps long so that I could cross them in the back versus how Moda Bake Shop has theirs with the button holes in the front. You can make your straps whatever length you prefer. If doing the button holes in front, and without a criss cross in the back, you could definitely keep these shorter. So adjust accordingly.**
You will need to take two strips that you previously cut for the straps. Sew along both long sides and only one short side with right sides together.
Clip the corners so that they lay flat and then turn right side out.
Repeat for other strap.
Iron both straps flat.
Now you are ready to add the straps to the bodice. Slide the strap in between a layer so that the un-sewn short side of the strap is even with the top of the bodice.
Pin in place and now sew along the top of the bodice, including armholes. I used a 1/4" seam allowance with straight stitch.
Clip the corners and turn inside out. Iron flat.
Now you are ready to add the button holes. I used a button foot and set it on the largest size so the strap could easily fit through.
Step 6: Ruffle that skirt!
Make It & Love It has great tutorial on how to ruffle. I had been struggling with ruffles but using this tutorial, I think I've got it right now! I have used the single seam for ruffling and it is easier, however, on this bigger project, I felt the finished look came out way better with the double seam. Do whichever you prefer, either will work.
I also used Make It & Love It's tutorial to help with placement. By following those instructions I was able to give my ruffle a more even look as compared to my first project. It's amazing what a difference 1 week makes! :) Anyways, you can see in my pictures that I used different colored pin heads to mark the middle on both the front and back of the bodice to match to the dress. With 32 strips it worked out pretty even with 4 strips to each section.
Step 7: Attach the bodice and skirt.
Align the rough edges of your skirt to the rough edges of your bodice, right sides together, and pin in place.
I sewed two stitch lines. The first I used a 1/4" seam allowance and then sewed a second for reinforcement with a 1/8" seam allowance.
This is how the ruffles should look once done.
Turn right side out, tie your knots any way you like, and admire your work!
Here is my littlest one with some of the best pictures I could get. She was not about to put her phone down and had no desire for pictures :-)
There are so many different ways the ties could be done and the dress could be worn. This makes for a versatile piece.
I hope you enjoyed my version of the tutorial and are pleased with your results!
~ Meg
Saturday, January 4, 2014
Peplum Bubble Dress
This is the Peplum Bubble Dress I constructed with modifications from The New Prudent Baby, Pretty Prudent website via Peplum Bubble Dress Tutorial with Pattern. I am incredibly excited about it, and while there are definitely imperfections on the inside, the outside looks pretty stunning to me (although, I definitely need to iron it out again.) This was a bit more detailed and I did not have some of the accessory feet that could have made this easier but I am still really pleased with the end results! The tutorial I followed had fantastic directions with many size options. I will say that this is a 4, and my daughter is in 4T's. It fit her with room to grow, but with an under shirt and even a pair of legging in the fall/winter, this will be a nice outfit away from the everyday norm!
This is my pre-assembled and cut pieces begging to be attached:
This is the front with a decorative finish on the bodice consisting of coordinating fabric yoyo's and buttons (and a first for me using bias tape):
This is the back. The tutorial called for an invisible zipper which I did not have but I thought this turned out just as cute and added a little extra style!:
FYI: I have had this fabric in my stash for months and while they do coordinate and compliment each other, I'll be glad to see it gone! Looking forward to more springy prints and colors... :-)
Happy Days to you!
Well.....This should be fun!
So, I am a stay-at-home mom of three. I now have a 1st grader, preschooler, and 10 month old. I am incredibly blessed to have such a supportive family. Not only do I do the day-to-day functions of taking care of the kids, their needs, and house work, but I am also a full-time student. As awesome as this ride has been the last 1.5 years, I was starting to feel like I was leaving a part of myself stuck away somewhere. I was resentful that I had lost contact with other adult human beings and losing talent that laid outside of my family. I needed a craft, a personal purpose. So, I endeavored to sew!
Now, as a young girl, I enjoyed to sew, but a devastating flood destroyed most of my possessions along with much of my family's as well. I had my own sewing machine and a type writer that I loved! Unfortunately, I did not pick sewing back up at that time. How I wished I would have! Who knows what I would be doing today if I had. However, like most young kids, our interests change on a whim and I still had lots to learn on the road that lied ahead of me.
Over the last 5 months or so, I have made multiple pillowcase dresses, curtains, and various house decor items. I never thought I had a crafty bone in my body outside of the status quo, but like most people, pinterest came along! I love pinterest. Not only does it have awesome ideas for DIY'ers, there are great starting points. Finding something I like, trying to modify it to fit my personal tastes, just gets the creativity wheels spinning! So, as a result, I have created this blog as a bit of a diary of my experiences with crafting, house keeping, and child rearing...in none of which am I an expert! I will call it a technological scrapbook while appeasing my need/desire to write, even when it's bad! :-)
Happy Days to you and may 2014 be the best year yet!
Subscribe to:
Comments (Atom)


