Monday, June 23, 2014

Featured!

The Magnolia Barn
I could not be more thrilled than to be teaming up with my sister-in-law Tara from The Magnolia Barn for some great projects! Not only do I get the privilege of styling her precious ones, but I get to grow and test my limits!

I hope you tune in because she will be showcasing an item I have made each week on her blog in a series called the Styled by Ana Rae Collection. In turn, I will be sharing with you her amazing blog filled with homeschool curriculum reviews, creative play activities, tot school ideas, and her by far better than mine photography skills!

Over the past couple of months, my orders have picked up and new ideas are passed my way. Which is wonderful! Being busy with kids, school, and extra curricular activities, it is sometimes hard to search and find new ideas or take on that big project I'm afraid to start on. Tara pushes me in that way! In the weeks to come, I hope you will see and appreciate the adventures we take in creating a collection for her girls.

Some of my newest work can be found on my facebook page which you can look at any time. However, those specific items and the thought process behind the designs might not be featured for a while.

So to start, Tara chose the Ruthie's Picnic Dress. You may remember this dress from a couple of months ago. I made this dress for my niece Summer for Easter with some slight changes to the original so that it could coordinate with her two sisters dresses.

So, enjoy this sneak peek of Summer in her dress and head over to Styled by Ana Rae Collection: The Ruthie Picnic Dress at The Magnolia Barn for more pictures! Be sure to check out all things wonderful on Tara's blog!

Saturday, June 21, 2014

Awesome Shorts! Nautical Style

I was recently asked for a special little outfit for a little boy! Since most of my market is for little girls, I was really excited about this! A couple months back I had made a layette set for the baby shower, so I was very excited to hear of his birth and a new request for a fourth of July inspired outfit.
I chose to use the Awesome Shorts pattern from Tye Dye Diva. It was a fantastic pattern and provides a few little extras for a nice finished look. The pattern features flat side pockets for boys and a gathered pouch pocket for girls which makes it even better! I love anything that can be used over and over again....and is unisex.
So, when I was asked to do a Fourth of July theme, I, of course, think of something that can be worn more than just once. I definitely wanted something red, white, and blue but yet not so thematical that it couldn't be worn again. The first fabric I wanted, was out of stock when I went to purchase it. I was super bummed but then I came across the anchor fabric and knew exactly which embroidery design would be perfect for it!
I had come across this Star Anchor Applique design from Embroidery Boutique. What stood out to me was that it had the star placement in the center of the anchor. Although the design does not have the traditional '1st 4th of July,' I felt the star stood out as an American, or patriotic, tribute for the Fourth of July Celebration.

It was exciting being able to hand this completed outfit over to its owner. I hope to see pictures real soon of baby boy in his new outfit!

Thanks for stopping by!

Tuesday, February 25, 2014

The Picnic Tunic and Toddler Sundress!


 It has been a while! Whew! With all the sickness going around, birthdays, Valentine's Day, a carnival, and school, I didn't think I'd see the light at the end of the tunnel. But alas, here I am and so very excited to share with you a project I completed a couple of weeks back.

Not long ago, I purchased the Ruthie Picnic Dress pattern from FooFoo Threads and I must say, this has become a favorite of mine and I have had the most compliments by far on this tunic/sundress.


A couple of things I learned along the way? How to applique and use interfacing. I had been wanting to test appliqueing but was so intimidated. So glad I took the chance on this pattern and dove in head first. It really was quite simple to do that I think I might start checking out more detailed appliques. But that is for another post! :)

As you can see in the below picture, the applique is the 'bib' that is on the front of the bodice. It is the contrasting fabric with the purple buttons on top. 


Interfacing is great for those spots we want to give a little stiffness and strength to such as button holes. Now, I have not used it on many projects because, to be honest, most of my projects have just been for show or for a single wear. For that, I never saw a reason to take the extra steps to add interfacing. However, if the item is going to be worn often and taken on and off frequently, DO use interfacing. It will help keep the garment in good looking shape without wearing down too bad.


So here is the finished product on my doll!


The biggest issue I had with this sundress was in no way a fault of the pattern design. It was purely self inflicted! As I was piecing together the bodice and the skirt, where the top of the skirt is obviously ruffled, I had a pin hiding in the folds. Yes, I was using a serger at the time. Yes, I know what you are thinking. Yes, that is exactly what happened!

The serger does not take kindly to anything but fabric. Needless to say, that hiding pin in the fold of the ruffles set me back a couple of days on other projects. With a lot of grunt work, I was able to finish this particular dress on the sewing machine, but I was so agitated with myself. Those pins can really hide! Scared me and the baby half to death when that little blade went flying across the room. And in a way I never thought I would feel when it came to my machines, I was heartbroken! Seriously....

Anyways, a week later and a replacement of the blades, I was back in business. It's amazing how much simpler and seamless projects are with a working serger. :)

So back to the pattern and designer...FooFoo Threads has some of my favorite patterns. They are all very detailed with many options that can be customized to suit your personal preference. Of course, there are many things that can be done just from the creativity of your own mind. However, I'm not confident enough yet to veer too far from the original patterns yet, but I'll get there.

The sizing is true to size, which is fantastic. Some other patterns that I like can be frustrating because they are not ready to wear sizing and some measuring has to be done, but these have never been that way for me. Or, I've just been lucky.

So bottom line, don't shy away from this pattern when you see the applique option. It is so worth it!


Thanks for stopping by!

~Meg

Friday, January 31, 2014

The 'Perfect Peasant' Dress

I have recently had some people bring to me some ideas for dresses for me to make. I was hesitant at first because I was not a huge fan of the dress, but after making them, I am in love with them. They were so easy to make and I had some great directions to follow, which makes it even better. 

After a couple of days, and yes, I literally mean a couple of days, I finally found the one that I thought would be the best pattern and have a great tutorial. I am pretty picky when it comes to patterns, and if I am going to buy them, they need to be in my language! Lots of pictures and detailed instructions. :) 

Not long ago I bought a pattern for some leggings, and after purchasing the pattern, reading the instructions, and then beginning the project, I got frustrated halfway through when the instructions were not as clear in doing as they were in reading. Anyways, now I do extra research to make sure I get what I'm looking for.

So on to the dresses! I decided to go with The Perfect Peasant from Peek-a-Boo Pattern Shop. Like I said, the instructions were very clear, with pictures to go along with every step. It also has a lot of options such as short and long sleeves, sash, and bows for hair clip or as an accessory for the sash. However, I made a modification on the long sleeve. Instead of doing a straight sleeve, I cut it in half and used the elastic to create a dimensional ruffled sleeve. I like this quite a lot better than just a straight sleeve. It was just missing something in my honest opinion. 

So here they are! I can not decide which I love more! There are so many things I could do with these. Sash, no sash, solid color, mixed patterns, dress or a top paired with leggings or ruffled pants, the list is endless. And by the way, in case you were wondering, I am working on ruffled pants and leggings to be paired with any of the dresses/tops that I create. I'm really excited! The most annoying part? Waiting for them to get here! Ugh, I seriously have an addiction to fabric!


Here are some individuals with my daughter posing. Please keep in mind, she does not like dresses! Haha...which makes these funnier!


Something I added, because I'm a fan of the finished edges, is the rolled hem. This is something I just learned and am so excited I took the time to find this one. You can see the threaded edges rather than just hemming. It adds just a little extra...something. :)


Another added touch? Monogramming! The downfall? My machine is not equipped to do very large prints. I am definitely thinking about getting a machine to accommodate for larger hoops if there is a need from requests. At this point, the largest I can do is 1.5" to 2" depending on the font. However, a way around this would be to use a contrasting thread. I'm thinking a dark blue would really have stood out on this.


Great pattern, great fabrics, lots learned! It was a great week and I am so happy with the end result!

Thanks for stopping by!

~Meg

Tuesday, January 21, 2014

The 'Izzy Top' and Ruffled Pants!

I recently came across this FREE pattern with included tutorial for the 'Izzy Top' from Climbing The Willow. This pattern was popping up all over my news feeds in different craft groups I follow and of course I had to jump on that bandwagon...it was too cute not to!


Here is the link for another free tutorial on how to make the ruffled pants from The Sewing Dork. It is hard to tell from the pictures, but my modifications are that I did not include elastic around the entire waistband. Rather, I stretched it across the back so the 'bunchiness' that it creates is around the back waist line rather than the front. Also, I put my ruffles closer together and did not make them as full as how most seem to be these days. Don't get me wrong, I love the big ruffles! But, for this tot who is still unstable on her feet, I opted for something that would not trip her up.


She was thoroughly excited, and not by her new outfit, but mostly because she heard the familiar voices of her brother and sister from downstairs. She was ready to go play after nap time! However, I was taking full advantage of her giddiness and snapping away as many pictures as I could get. :-)


I  am thinking we have a winner for her Valentine's Day/ FIRST Birthday party outfit?? This was my intent when making the outfit anyway. But you never know, there is a good possibility I will find another pattern I just HAVE to try! Which happens...ALOT!

On another note, did you happen to spot my new labels? I am so excited to be able to add that little extra touch, you know? I plan to eventually have embroidered labels but for now, and with everything else I've been creating, I will stick with these until I run out. But not too bad for printable fabric.


And just because I adore my little model, here's another of her beautiful face!


Thanks for stopping by!

~Meg

Saturday, January 18, 2014

The 'Cindy Lou' Dress!


This dress is from the pattern 'Cindy Lou' by FooFoo Threads! I am so excited about this dress! It was a challenge in every way for me to complete since I am still a newbie, but I learned so much. Plus, it turned out exactly as it was supposed to. It is perfect!

This was my first time actually following a pattern. I have tried in the past to follow patterns from big commercial brands, such as Simplicity, and they have always seemed so difficult, so there they sit in the cubby collecting dust. Maybe now that I know I can actually follow a pattern and understand the instructions, I will have to pull the others out and give them a try!

 This dress has such a whimsical flare to it and even my daughter, who is not big on dresses, loved this dress. Probably, too, because I let her pick the fabric out. Blue is her favorite color which was great because blue goes with just about anything. However, she specifically asked for a blue and orange dress. Obviously, I catered to her wish and I'm so glad I did. This will be a perfect spring/summer dress. And hopefully, since she had a hand in the design, she will actually put it to use! One can hope...


One of my favorite parts of this dress are the knotted ties. They are a big trend right now and super easy to do! The back and side ties really give this dress that extra flare.


And, let's not forget the ruffles! Ruffles, ruffles everywhere! Check them out...the straps, along the top of the bodice, the skirt, and the underskirt. They really add volume to the dress and provide it with its own natural twirl.The lay of the dress is full without being too bulky.


Ah, and here she is in all her glory. My little girl showing off her new dress! Her favorite thing by the way...twirling! She loves that when she spins around the room, the dress flares out. Who can blame her!? It was my favorite thing when I was little too. Oh, that and my picture taking (clapping) shoes! :-)


If you loved this dress as much as we did, head over to FooFoo Threads to get your pattern.

Have a question? Comment or send me a message. I'd love to hear from you!

Thanks for stopping by!

Meg

Monday, January 6, 2014

How to make a Knotted Jumper!


*Please read through full tutorial before beginning any project to make sure the instructions are clear. I have started a few projects only to stop half way through because the instructions were not clear. I will try to make them as clear as possible, but if there are any questions, please let me know so I can update where needed. Thanks!*

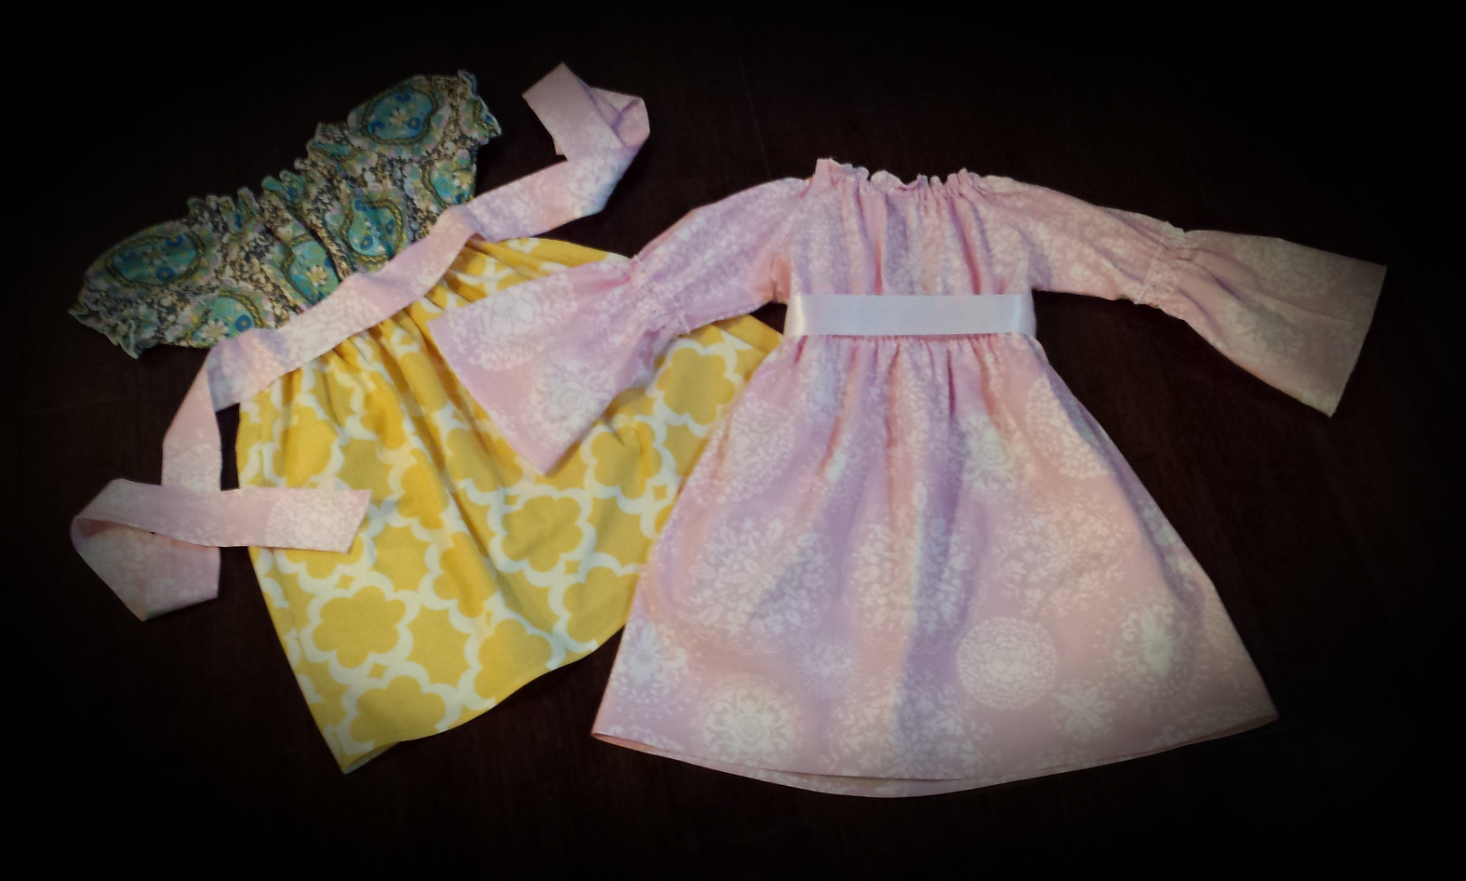
I am in love with the twirly mixed patterned knot dresses and have been wanting to make one for a while now. When I stumbled across this tutorial by Cheri at Moda Bake Shop I was beyond excited! So many I find are intricate with lots of detailing and I was looking for something a little more basic so that I could practice ruffling and button holes (for the knot ties).

This is my step by step instruction in order by which I completed the dress.

What you'll need:

* PDF Download for bodice found from Moda Bake Shop (18-24 months) in above link.
       You will need to download this and open with Adobe. Print 'Actual Size' for accuracy.
* Jelly Roll (multi patterned strips - see below)
* 1 yard coordinating fabric
* Coordinating thread
* Fabric Scissors and/or rotary cutter
* Cutting mat
* Iron 

Step 1: Cut out your fabric pieces. You will need 4 bodice pieces, 32 jelly roll strips, 5" long x width of skirt for bottom strip, and strips for your knotted ties. 


Begin by deciding on the pattern you wish to have when you look at the dress. Once you have that, you will need to iron the strips and then cut each strip into fourths until you have the desired width, which in my case was 32 strips.

You can then line them out to determine the width of the skirt in order to measure out the bottom strip of the skirt. Again, the length should be 5" long x's width of skirt. Once you have that cut, fold this strip in half lengthwise to give you a 2.5" length, with wrong sides together, so that you have the right side of the pattern on the front and back of the strip.

Using the pdf bodice pattern, or any other bodice pattern you prefer, cut 4 separate pieces. Iron flat.

For the straps I took two full jelly roll strips and halved them, giving me a total of 4 strips. And, iron flat.


Step 2: Sew the jelly roll strips together using a straight stitch or zig-zag to form the skirt. 

Sew along the right side of the strip with right sides together.


I used an overcast stitch, as shown below, which is probably overkill but I like the finished look. If using a straight stitch, open seams and iron flat so there is no bulk under the dress.


Then, iron out the skirt to prepare it for the next step.

Step 3: Add the bottom strip to the dress.

This can be done by laying the bottom strip on top of the right side of the skirt, rough edges aligned.

Pin the fabric so that it stays in place and then sew with your preferred stitch.


Once done, flip down and iron flat.


Step 4: Sew the bodice pieces.

Take two bodice pieces right sides together and sew along the sides. (Not the armholes or neck line)

Repeat for other two bodice pieces.

Next, put one bodice piece inside the other with right sides touching. You should only see the wrong sides.

Step 5: Sew the straps, finish bodice, add button holes.

**Note: I made my straps long so that I could cross them in the back versus how Moda Bake Shop has theirs with the button holes in the front. You can make your straps whatever length you prefer. If doing the button holes in front, and without a criss cross in the back, you could definitely keep these shorter. So adjust accordingly.**

You will need to take two strips that you previously cut for the straps. Sew along both long sides and only one short side with right sides together.

Clip the corners so that they lay flat and then turn right side out.

Repeat for other strap.

Iron both straps flat.

Now you are ready to add the straps to the bodice. Slide the strap in between a layer so that the un-sewn short side of the strap is even with the top of the bodice.


Pin in place and now sew along the top of the bodice, including armholes. I used a 1/4" seam allowance with straight stitch.

Clip the corners and turn inside out. Iron flat.


Now you are ready to add the button holes. I used a button foot and set it on the largest size so the strap could easily fit through.

Step 6: Ruffle that skirt!

Make It & Love It has great tutorial on how to ruffle. I had been struggling with ruffles but using this tutorial, I think I've got it right now! I have used the single seam for ruffling and it is easier, however, on this bigger project, I felt the finished look came out way better with the double seam. Do whichever you prefer, either will work.

I also used Make It & Love It's tutorial to help with placement. By following those instructions I was able to give my ruffle a more even look as compared to my first project. It's amazing what a difference 1 week makes! :) Anyways, you can see in my pictures that I used different colored pin heads to mark the middle on both the front and back of the bodice to match to the dress. With 32 strips it worked out pretty even with 4 strips to each section.


Step 7: Attach the bodice and skirt.

Align the rough edges of your skirt to the rough edges of your bodice, right sides together, and pin in place.


I sewed two stitch lines. The first I used a 1/4" seam allowance and then sewed a second for reinforcement with a 1/8" seam allowance.

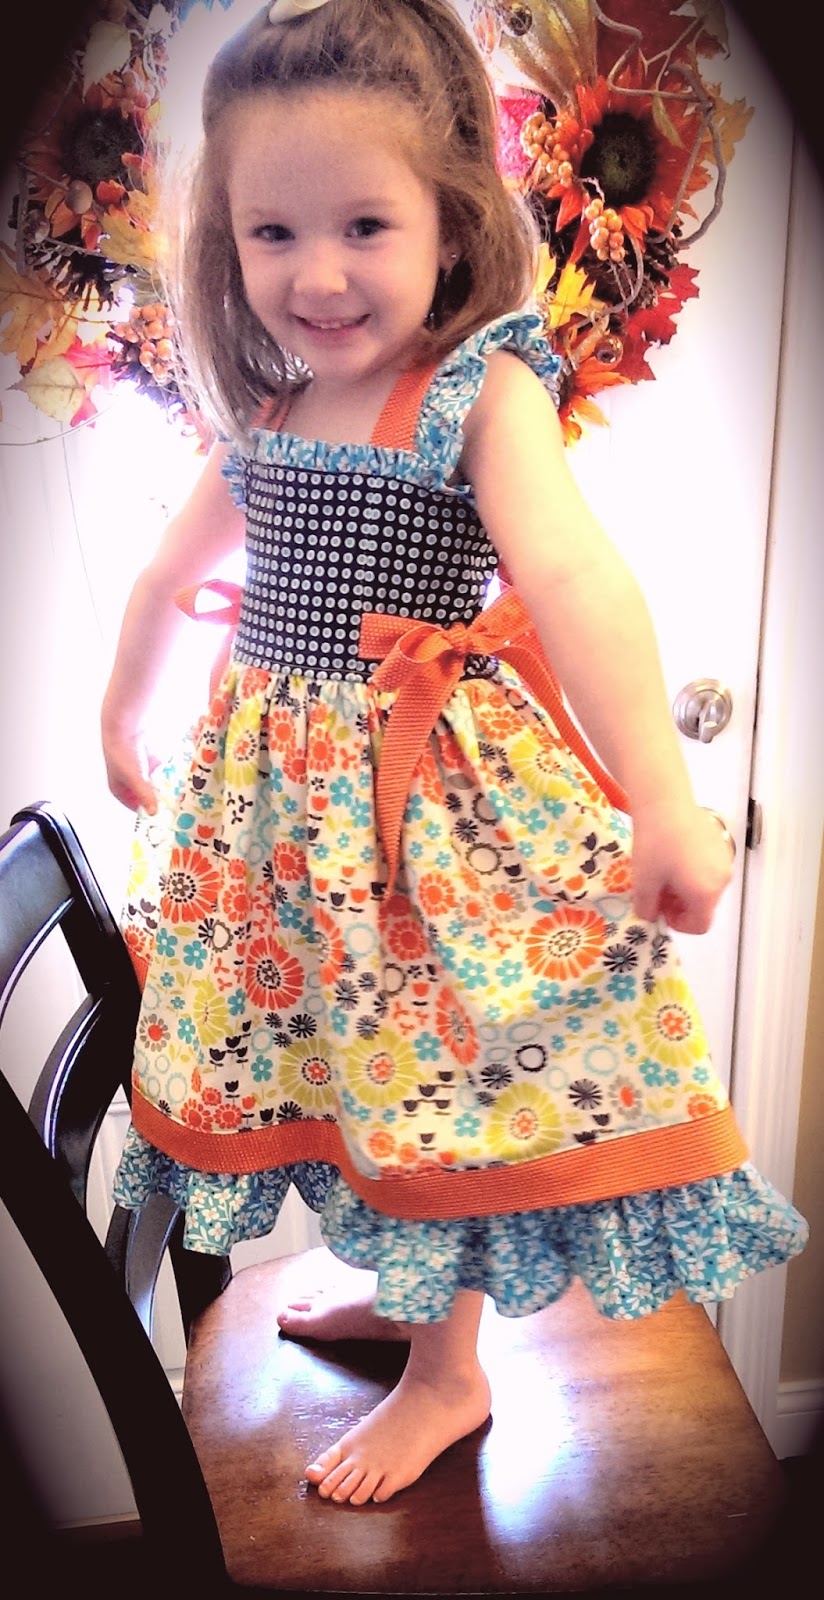
This is how the ruffles should look once done.


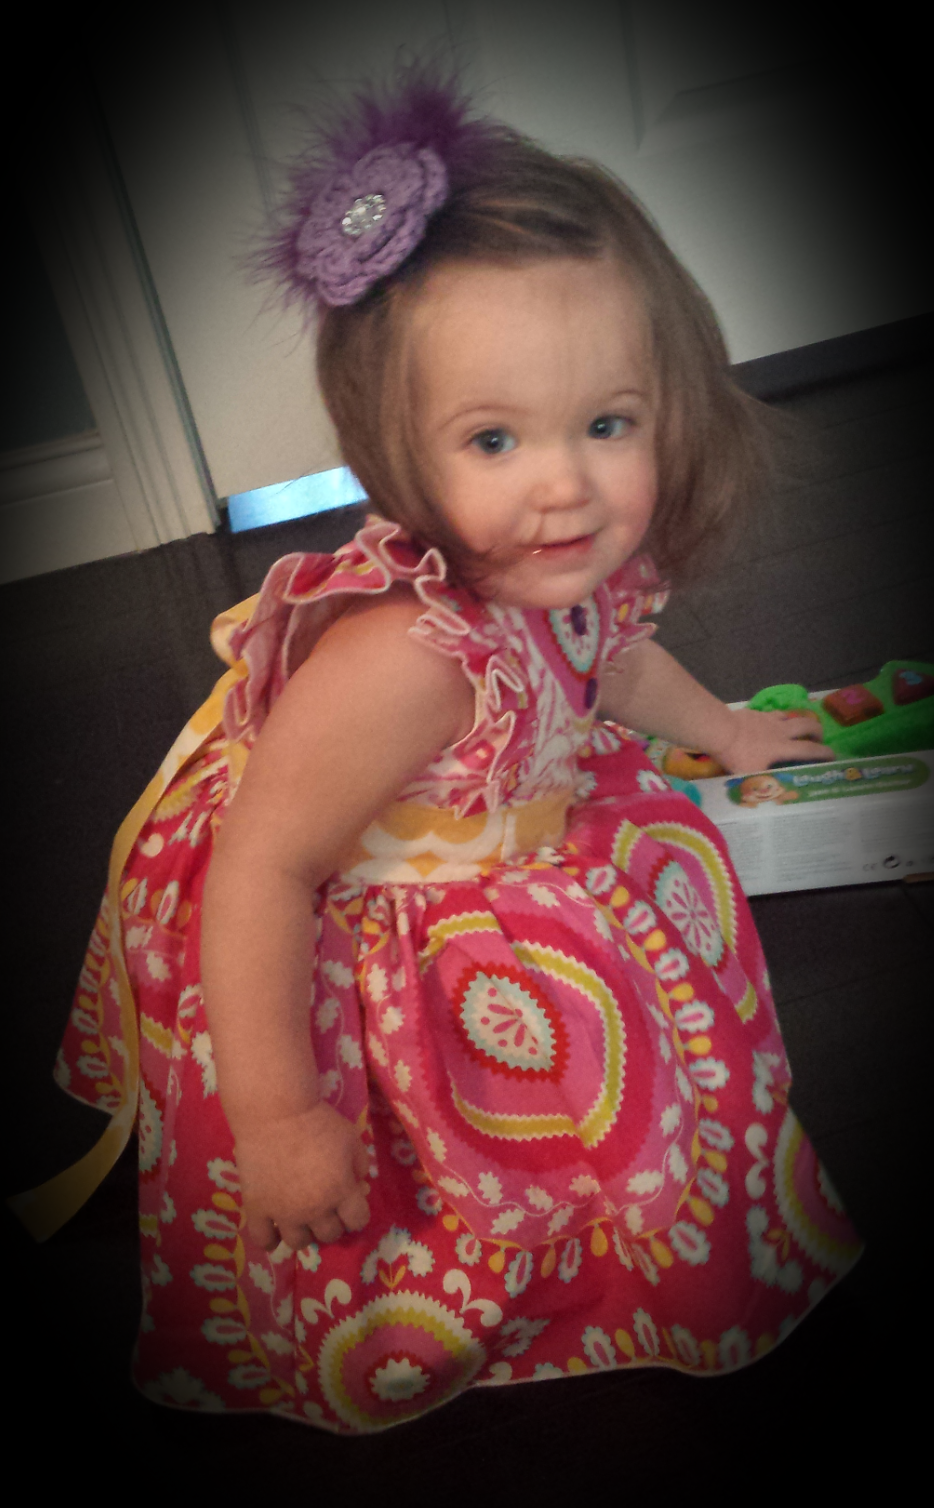
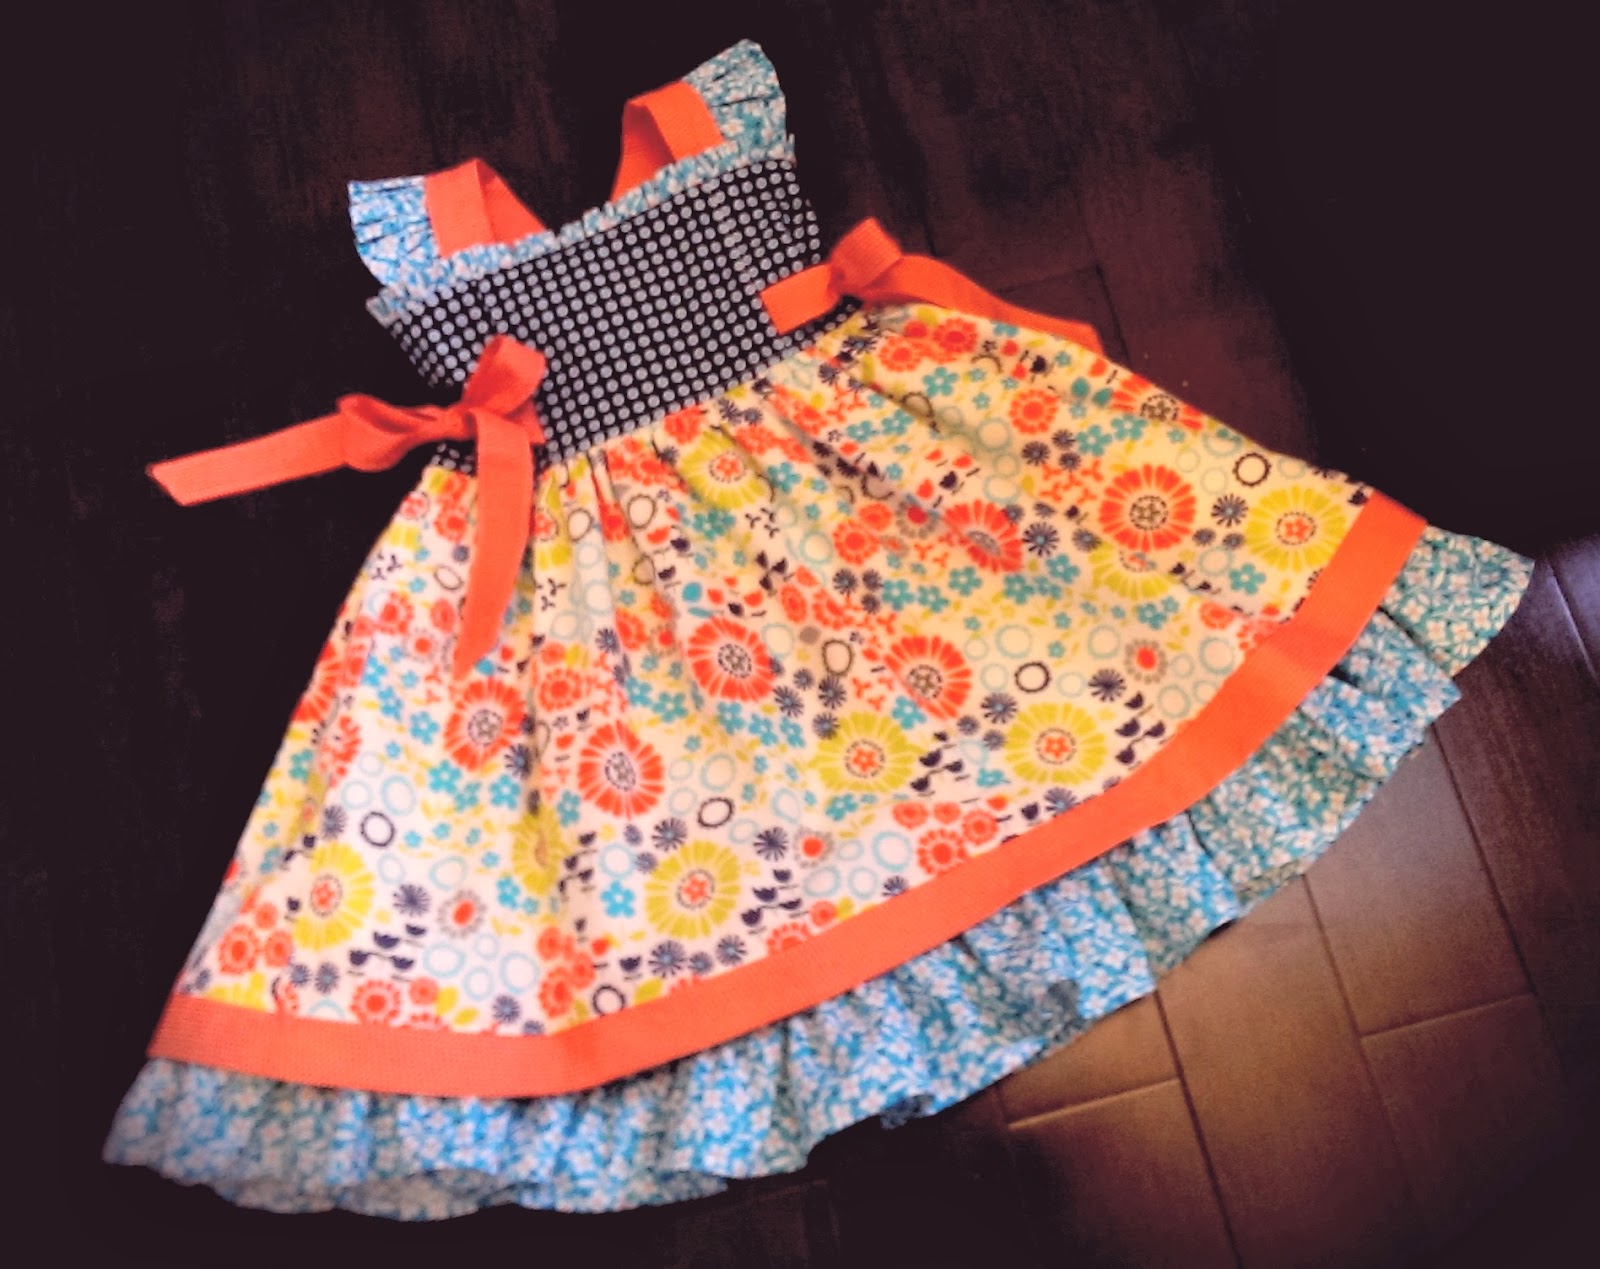
Turn right side out, tie your knots any way you like, and admire your work!

Here is my littlest one with some of the best pictures I could get. She was not about to put her phone down and had no desire for pictures :-)


There are so many different ways the ties could be done and the dress could be worn. This makes for a versatile piece.


I hope you enjoyed my version of the tutorial and are pleased with your results!

~ Meg